Learning how to setup your mobile register will streamline your business and help you get the most out of your product.
First, make sure your hardware is ready to go!
Once you’ve watched this video and setup your iPad/Tablet for mobile checkout, you’ll then be ready to take payments on the go as well.
Creating Your Register
Navigate to to the register settings:
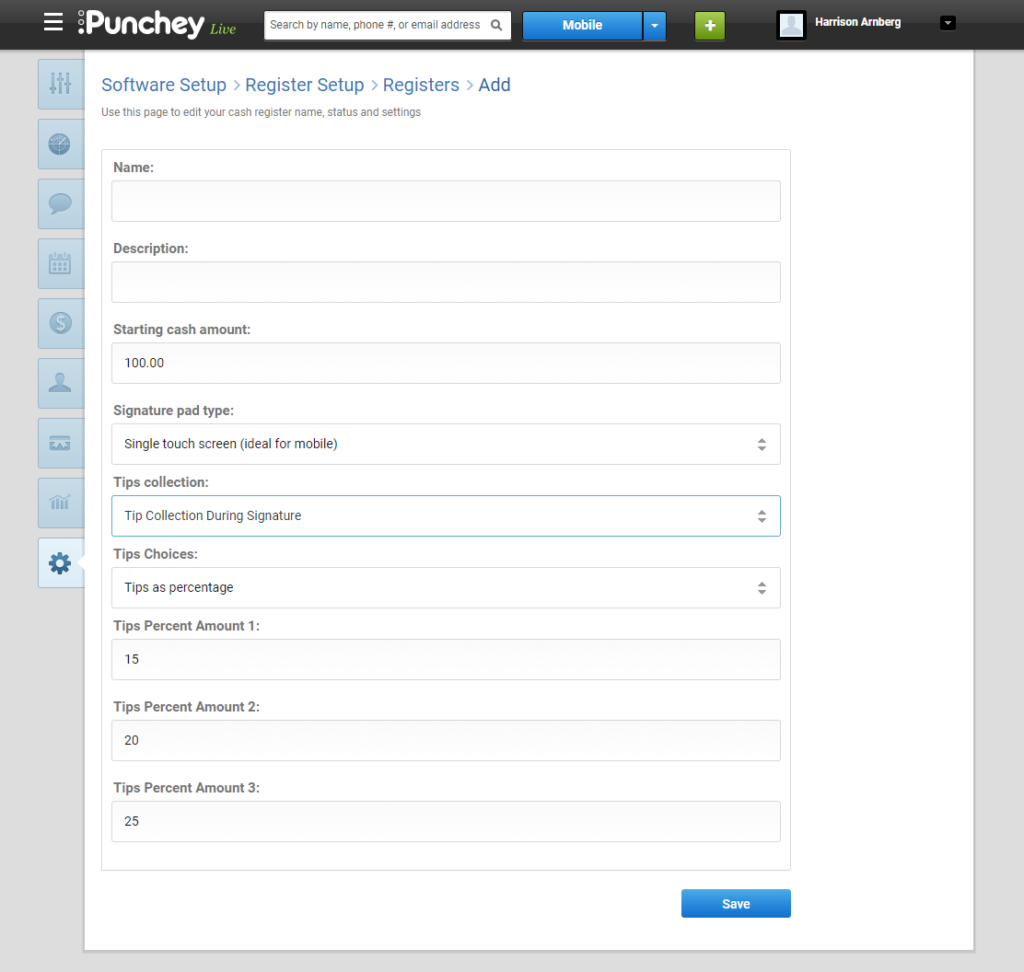
- Settings > Software Setup > Point of Sale Module > Registers
- Select +Add a New Register

- Add a name and description for your register. i.e. Mobile Van
- Set the starting cash amount.
- Set the Signature pad type to Single Touch Screen
- Configure your tip preferences
Selecting Your Register
Now that your mobile register has been created, its time to make it your default register on your mobile device.
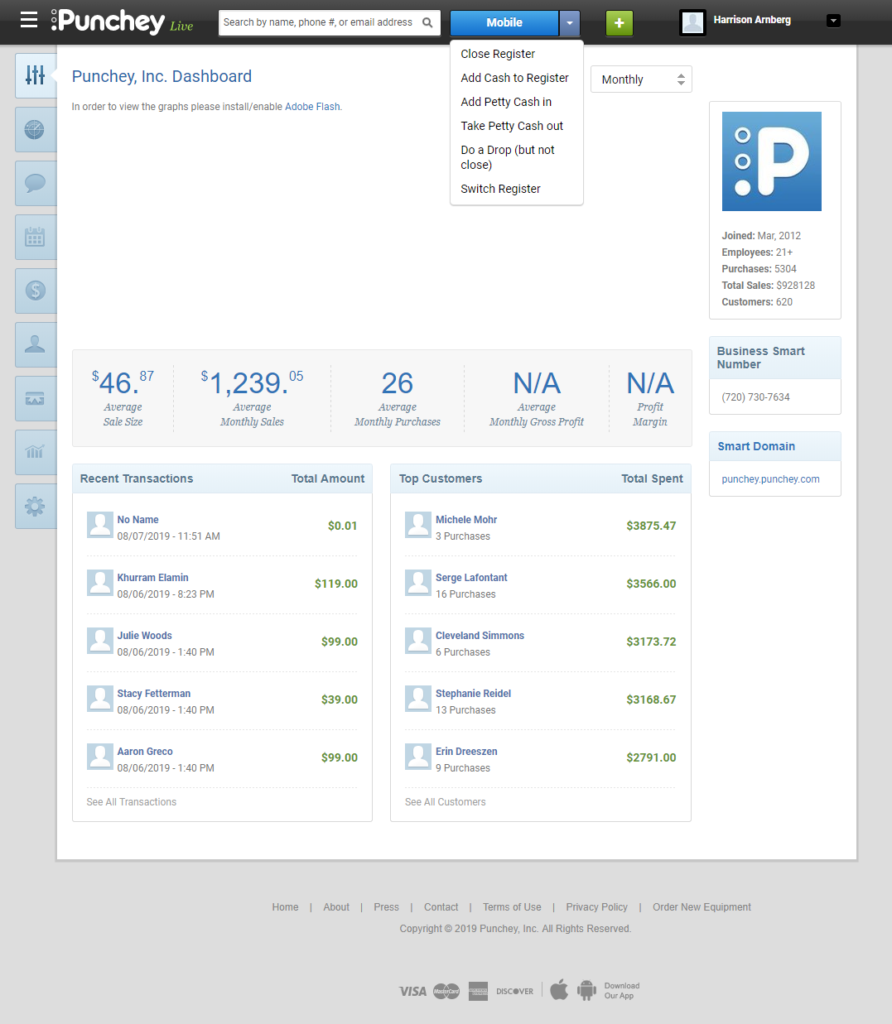
- Select the blue drop down button at the top of your screen, next to your search bar, and choose Switch Register.

- Now, just select and open your mobile register on your iPad/Tablet.
- You can do this just once or, if you want a detailed report of cash and credit transactions, you can open and close your register each day or shift.
You are now ready to tackle mobile payments in the field!
Want to learn more? Check out our YouTube Channel for helpful content and read more of our how-to guides!